If you’re searching for the Top 10 Epoxy FAQ’s, you’ve come to the right place. Whether you’re a DIY enthusiast experimenting with epoxy resin, a woodworker creating river table masterpieces, or simply curious about epoxy coatings… the right resources can make all the difference. In this guide, we’ve rounded up the 10 Best FAQs that deliver the answers to some of the most popular questions.
Table of Contents
- Deep Pour vs. Table Top Epoxy: What’s the Difference?
- When Should I Use Deep Pour vs. Table Top?
- Ideal Temps & Humidity for Curing Epoxy
- Why Is My Epoxy Bubbling (and How to Stop It)?
- How Long Is Epoxy Good For—Before & After Opening?
- How to Fix a Cloudy Epoxy Result
- Can Table Top Epoxy Be Poured Over Deep Pour?
- What to Use to Clean Between Layers (and What to Avoid)
- How to Add Mica Powder & Liquid Pigments
- Pressure Pot: Pros & Cons for Casting
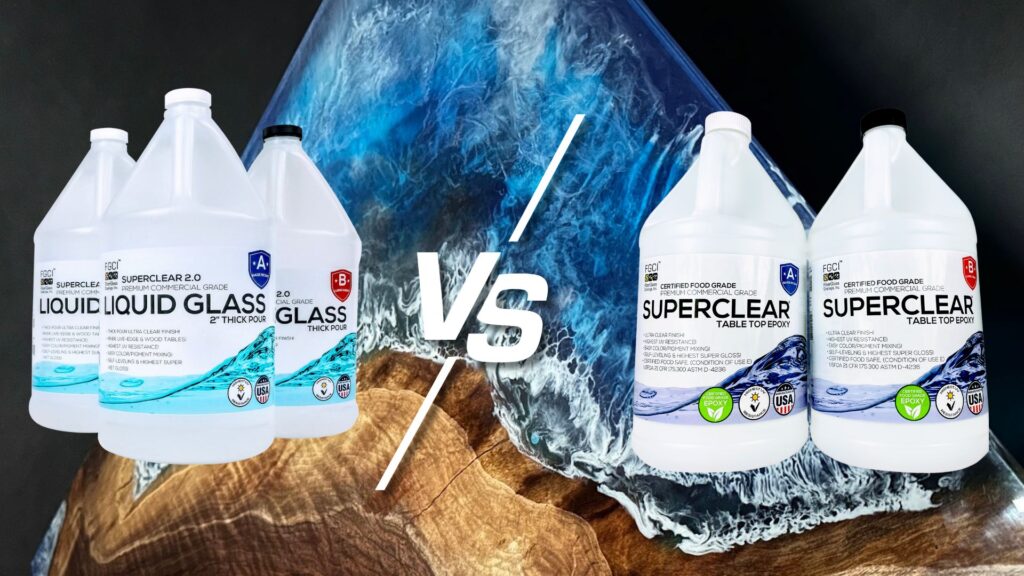
Deep Pour vs. Table Top Epoxy: What’s the Difference (And What About 24 HR Deep Pour)?
If you’re diving into the world of Epoxy Resin, you’ve likely seen products labeled Deep Pour and Table Top…maybe even our 24 Hour Deep Pour version. They all sound similar, but they’re designed for different uses. Choosing the right one is key to getting flawless results.
Let’s break down the differences so you can pick the perfect formula for your next project.
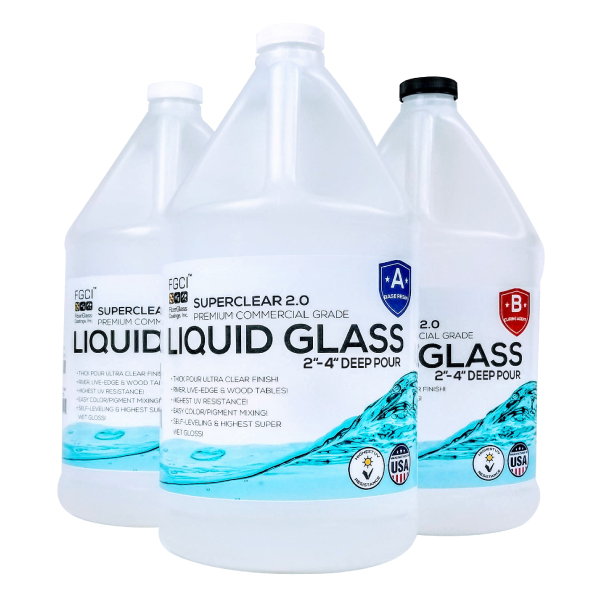
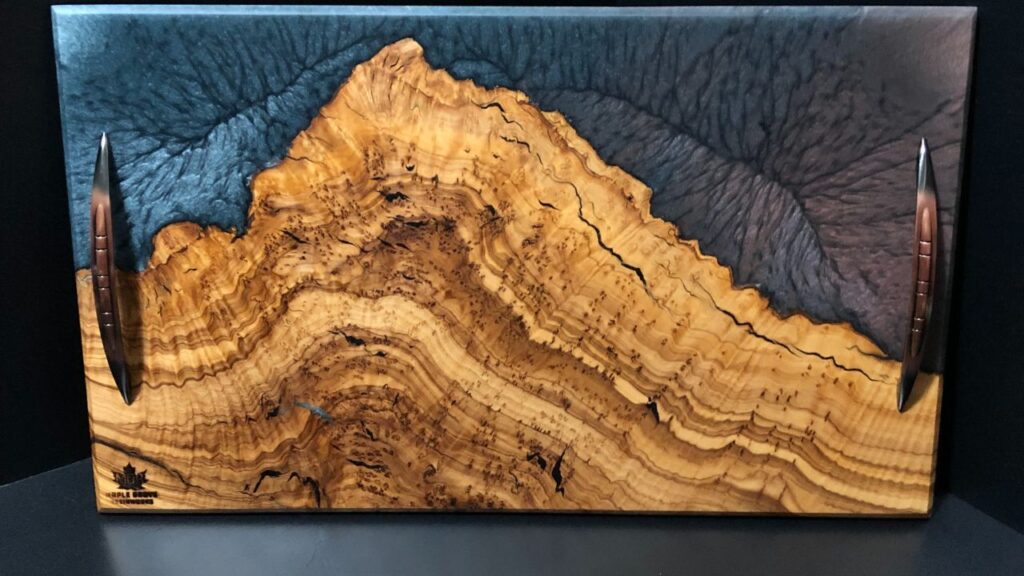
Deep Pour (Liquid Glass 2–4”):
This is the heavy hitter of our resin lineup, it’s made for thick pours…we’re talking up to 4 inches in a single layer.
Best for:
- River tables
- Large castings
- Encapsulations (flowers, objects, keepsakes)
- Projects where you need major depth and clarity
What to know:
- Mix Ratio: 2:1 by volume
- Pour Depth: Up to 2–4 inches
- Gel Time: 10–12 hours
- Demold Time: 48–72 hours
- Full Cure: 30 days
This is the formula to use when visual depth and optical clarity are your top priorities.
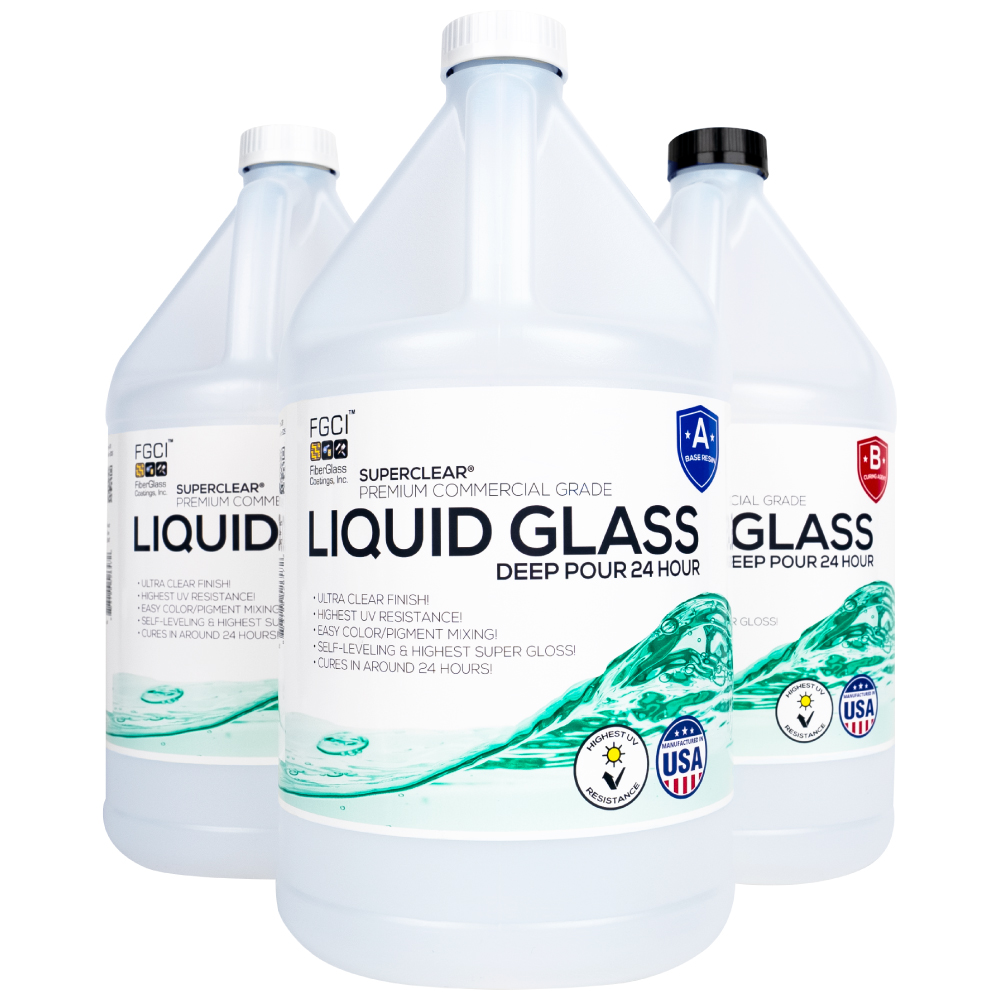
24 Hour Deep Pour:
Need that same Deep Pour capability, but faster? Our 24 Hour Deep Pour Epoxy strikes a balance between performance and speed.
Best for:
- Charcuterie boards
- Coasters
- Small to medium molds
- Quick turnaround casting projects
What to know:
- Mix Ratio: 2:1 by volume
- Pour Depth: Up to 1 inch per layer
- Gel Time: 18–20 hours
- Demold Time: 24–36 hours
- Full Cure: 30 days
You get the same high clarity finish as our original Deep Pour, just with a faster cure time and a slightly shallower pour depth. Great for makers who don’t want to wait several days between pours.
Table Top Epoxy:
This is our go to for thin, protective coatings on horizontal surfaces.
Best for:
- Bar tops and table tops
- Countertops
- Wall art
- Coasters and serving trays
- Sealing wood or photos
What to know:
- Mix Ratio: 1:1 by volume
- Pour Depth: Up to 0.25 inches
- Gel Time: 30–45 minutes
- Demold Time: 24 hours
- Full Cure: 30 days
It’s easy to use, cures fast, and leaves a crystal-clear, high gloss finish. It’s also food safe and scratch resistant, perfect for surfaces that see daily use.
🔍 Quick Comparison Chart
| Feature | Deep Pour 2–4” | Deep Pour 24-Hour | Table Top Epoxy |
| Max Pour Depth | 2–4 inches | 1 inch | 0.25 inches |
| Mix Ratio | 2:1 | 2:1 | 1:1 |
| Gel Time | 10–12 hours | 18–20 hours | 30–45 minutes |
| Demold Time | 48–72 hours | 24–36 hours | 24 hours |
| Best For | River tables, large casts | Boards, coasters, mid-size molds | Surface coatings |
Final Thoughts
With Superclear, choosing the right epoxy isn’t about better or worse, it’s about what fits your project.
- Want deep, clear pours? Go with Liquid Glass 2–4” Deep Pour.
- Need a faster solution for smaller castings? Try 24-Hour Deep Pour.
- Just want to coat and protect a surface? Table Top Epoxy is your new best friend.
When Should I Use Deep Pour vs. Table Top?
Choosing the right epoxy for your project can make or break your results…literally. One of the most common questions we get is:
“When should I use Deep Pour, and when should I use Table Top?”
Here’s your go-to guide to get it right every time.
Use Deep Pour Epoxy When…
You’re working on projects that need serious depth and crystal clarity.
Think:
- River tables
- Large molds and castings
- Encapsulation work (like preserving objects in resin)
Deep Pour Epoxy is made for pours between 1–4 inches thick. It has a low exotherm (it releases heat at a slower rate than a normal Table Top Epoxy), and it cures slowly and evenly. It’s perfect for those thick layers that need time to settle without bubbles. Keep in mind curing time and quality will be dependent on temperature and humidity conditions. (70°F to 80°F, 40-50% Humidity)
Bonus:
If you’re layering multiple pours, Deep Pour lets you go thick in fewer layers, saving time and effort in the long run.
Use Table Top Epoxy When…
You’re coating flat surfaces and want a glossy, protective finish.
Think:
- Table tops
- Bar tops
- Countertops
- Coasters
- Artwork
Table Top Epoxy is for thin coats (up to 1/4 inch). It’s easy to mix (1:1 ratio), cures quickly, and leaves a high gloss, glass like finish that’s tough, scratch resistant, and food safe.
Bonus:
Perfect for DIYers and first timers. It’s beginner friendly and forgiving. Just pour, level and go.
Bottom Line
| Project Type | Use This Epoxy |
| River tables, molds | 🟦 Deep Pour |
| Bar tops, flat coats | 🟧 Table Top |
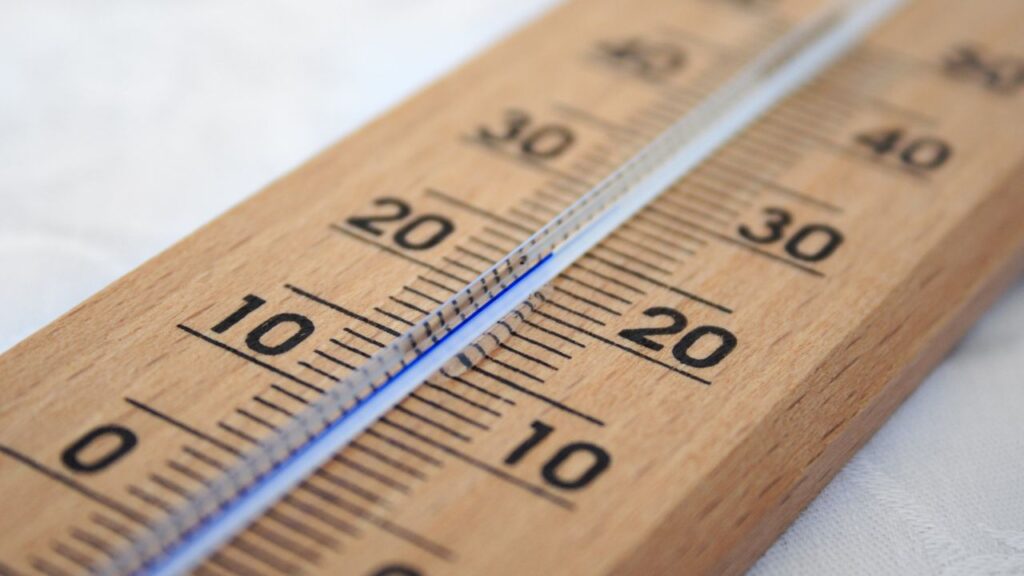
What Are the Ideal Temperatures and Humidity to Cure Epoxy Resin?
When it comes to getting a perfect epoxy finish whether you’re casting a river table, coating a countertop or sealing artwork, temperature and humidity matter more than you might think. These two environmental factors can make or break your project, especially during curing. Let’s break down the ideal conditions so you can pour with confidence and avoid sticky surprises.
Ideal Temperature for Curing Epoxy Resin
For a smooth, consistent cure, aim for:
👉 70°F to 80°F (21°C to 27°C)
This is the sweet spot for most epoxy resin systems, including all Superclear products.
But here’s the key for Deep Pour:
The ideal temperature depends on how thick or how much resin you’re pouring.
- For thinner pours around 1 inch, the normal range of 70°F–80°F works perfectly
- As the pour gets deeper and/or the total volume increases, you’ll want to lean toward the lower side of the range (closer to 70°F)
Think of it as a sliding scale:
The thicker or larger the pour, the cooler your environment should be. This helps prevent overheating, cracking, or excessive exotherm during curing.
Why it matters:
- Too cold (below 60°F): The epoxy may cure slowly, remain soft, or fail to cure fully
- Too hot (above 85°F): It may cure too quickly, trap bubbles, or develop surface issues like yellowing or warping
💡 Tip: Always keep the temperature steady during the entire curing process, not just during the pour.
Ideal Humidity for Epoxy Curing
Humidity should stay below 60%, ideally around 40% to 50%.
Why it matters:
- High humidity can cause surface issues like blushing, cloudiness, or a tacky finish.
- Moisture in the air can interfere with the chemical reaction, especially with surface coatings like Table Top Epoxy.
💡 Tip: Use a dehumidifier if you’re working in a damp basement, garage, or during rainy weather.
Final Thoughts: Keep It Controlled
To Recap:
| Condition | Ideal Range |
| Temperature | 70°F – 80°F (21°C – 27°C) |
| Humidity | 40% – 50% |
Keeping your workspace within these ranges helps ensure:
- Smooth cures
- Bubble free finishes
- Strong, durable results
So before you mix and pour, take a second to check your environment…your project will thank you.

Why Is My Epoxy Bubbling (and How to Stop It)?
You mixed your epoxy, poured it, and stepped back to admire your work only to see tiny bubbles rising to the surface. Sound familiar? Bubbling is one of the most common issues in resin projects, and while it’s frustrating the good news is: it’s usually preventable once you understand what’s causing it.
Let’s break down the most common culprits behind those pesky post pour bubbles and how to stop them before they start.
1. Air Trapped During Mixing
The most frequent cause of bubbles? How you mix your resin.
If you mix too fast or too aggressively, you’ll whip air into the resin. These air pockets can get trapped and slowly rise to the surface after the pour.
Fix it:
- Mix slowly and steadily, scraping the sides and bottom of your container.
- Use a flat stir stick (not a round spoon) to reduce turbulence.
2. Pouring in Cold Temperatures
Cold Epoxy = Thick Epoxy and thick epoxy traps bubbles.
When your workspace or resin is too cold, bubbles have a harder time escaping before the resin starts to gel.
Fix it:
- Warm your resin bottles in a hot water bath (closed lids!) before mixing
- Make sure your working environment is between 70°F–80°F (21°C–27°C)
3. Air Escaping From the Surface
If you’re pouring over raw wood, porous concrete, or anything with air pockets, that surface can slowly release air into the resin and create bubbles after the pour.
Fix it:
- Seal the surface with a thin layer of epoxy first, let it cure, then do your main pour
- Use a heat gun or torch right after pouring to pop surface bubbles as they rise
4. Using the Wrong Resin for the Job
Different epoxy formulas are designed for different purposes. For example, if you’re trying to do a Deep Pour with a Table Top Epoxy, it will cure too fast and trap more air, causing bubbles.
Fix it:
- Use Deep Pour epoxy for castings and river tables
- Use Table Top epoxy for surface coatings and thin layers
5. Vibrations or Movement During Cure
If your mold or table vibrates even just slightly during curing, bubbles can be jostled loose and float up late in the game.
Fix it:
- Pour your resin in a stable, level area
- Avoid moving or bumping your project for at least the first 12–24 hours
Final Tip: Use Heat But Use It Right
A torch or heat gun can be your best friend for bubble removal but don’t overdo it.
- Pass it lightly over the surface (6–8 inches away)
- Don’t hold it too close or too long, or you’ll risk burns or yellowing
Bottom Line
Bubbles are annoying, but they’re also completely manageable once you know where they come from. By controlling your environment, using the right resin, mixing carefully, and applying heat correctly you’ll be on your way to a glass like finish every time.
How Long Is Epoxy Good For: Before & After Opening?
If you’re like most makers, you’ve probably wondered:
“How long can I store my epoxy resin before it goes bad?”
Or maybe:
“I opened it a while ago… is it still good?”
Good news…epoxy resin has a decent shelf life, but there are some key things to know to get the most out of it. Let’s break it down:
Shelf Life (Unopened)
Epoxy resin is typically good for 6 to 12 months from the date of manufacture, as long as it stays sealed and is stored correctly.
Ideal Storage Conditions:
- Temperature: 60°F – 80°F (15°C – 27°C)
- Dry, indoor environment
- Away from direct sunlight or heat sources
Pro tip: Always check the label or packaging date if you’re unsure. Using resin that’s been sitting for over a year? Test a small batch before using it on a full project.
Shelf Life (After Opening)
Once opened, the clock ticks a little faster. Expect a shelf life of 3 to 6 months, depending on how well it’s stored.
Why the Shorter Window?
Once the containers are opened, moisture in the air can start to affect the hardener (Part B), causing:
- Yellowing
- Cloudiness
- Weird textures
- Or even a failed cure
How to Extend Shelf Life
Want to make your epoxy last? Here’s how:
- Keep the lids tightly sealed after each use
- Wipe clean the rims before sealing to prevent air leaks
- Store indoors, never in the garage or shed where temps swing wildly
- If possible, store Part B (the hardener) with a desiccant pack to help absorb moisture
Signs Your Epoxy May Be Expired
- Part A looks cloudy or has crystals
- Part B has turned dark yellow or amber
- You notice separation or clumping
- The resin doesn’t fully cure or stays tacky
If you see any of these signs, don’t risk it. Resin that won’t cure properly can ruin your whole project.
Final Thoughts
| State of Resin | Shelf Life |
| Unopened | 6–12 months |
| Opened | 3–6 months |
Epoxy resin doesn’t last forever, but with proper care and storage, you can keep it fresh and ready for your next project. When in doubt, test a small batch first.

How to Fix a Cloudy Epoxy Result
If the epoxy has already cured and looks cloudy, you still have a few options:
1. Sand and Recoat
This is the most common and reliable fix.
Steps:
-
- Sand the cloudy surface with 220–320 grit sandpaper until it’s even and smooth
- Wipe clean with isopropyl alcohol (91%+)
- Pour a fresh topcoat of Table Top Epoxy or Art Resin
- Sand the cloudy surface with 220–320 grit sandpaper until it’s even and smooth
This will restore the glossy clear finish you were going for.
2. Use Heat (for Mild Cloudiness)
If your resin is only slightly cloudy from microbubbles or a cold cure, try gently warming the surface with a heat gun or hair dryer.
Important: This only works within the first few hours after pouring. Once it’s fully cured, heat won’t help.
3. Polish It (Optional for Coatings)
For surface level haziness (not deep clouding), wet sanding and polishing may help restore clarity.
Steps:
-
- Wet sand with fine grits (400 → 800 → 1500)
- Use a plastic polish or automotive buffing compound
- Buff with a soft cloth or orbital buffer.
- Wet sand with fine grits (400 → 800 → 1500)
How to Prevent It Next Time
-
- Work in 70–80°F temps (21–27°C)
- Keep humidity below 60%
- Seal porous surfaces first with a thin epoxy coat
- Mix slowly and thoroughly (scrape the sides and bottom)
- Use a heat gun immediately after pouring to pop bubbles
- Store epoxy indoors (not in a garage or shed)
- Work in 70–80°F temps (21–27°C)
💡 Final Thoughts
Cloudy epoxy resin doesn’t mean your project is ruined. In many cases, it’s fixable with a little sanding and a fresh coat or even just a bit of heat. Once you know how to prevent it, you’ll be set up for crystal clear success every time.
Got a cloudy resin issue you’re not sure how to handle? Send us a photo—we’re happy to help troubleshoot.
Can Table Top Epoxy Be Poured Over Deep Pour?
Short answer? Yes absolutely, but (and it’s an important but) you need to follow a few key steps to make sure it bonds correctly and cures beautifully.
Why You’d Do This
Deep Pour Epoxy is amazing for thick pours, like river tables and castings but once it’s cured, you’ll often want a tough, glossy topcoat to seal and protect the surface. That’s where Table Top Epoxy comes in.
It’s self leveling, scratch resistant, and gives you that high gloss, glass like finish.
How to Pour Table Top Over Deep Pour Resin
1. Let Deep Pour Fully Cure
Your Deep Pour Epoxy should be:
- At least 72 hours cured
- Hard to the touch and no longer tacky
If it’s fully cured (over 3+ days), you’ll want to sand it lightly to help the Table Top layer adhere.
2. Scuff Sand the Surface
If the Deep Pour is beyond its recoat window:
-
- Sand with 220–320 grit sandpaper
- Wipe clean with isopropyl alcohol (91%+)
- Make sure the surface is dry and dust free
This gives the Table Top Epoxy something to grip onto.
3. Pour Your Table Top Epoxy
- Mix at a 1:1 ratio by volume
- Pour evenly across the surface
- Use a heat gun or torch to pop any bubbles
Let it level, cure, and you’re done!
A Quick Note on Timing
If you’re pouring Table Top within 24–36 hours of the Deep Pour (and the surface is still slightly tacky), you can skip sanding. The chemical bond will form naturally.
But if the Deep Pour is fully cured and hard? Sanding is a must.
✨ The Result
You’ll end up with:
- A strong bond between layers
- A crystal clear, glassy surface
- Long-term durability and scratch resistance
It’s the perfect finishing touch for river tables, charcuterie boards, coasters, and more.
Final Tip:
Always pour Table Top Epoxy in a temperature controlled space (70–80°F) with low humidity for the best results.

What to Use to Clean Between Layers (and What to Avoid)
- If you’re prepping to pour a second layer of epoxy, you already know surface cleanliness is critical. But what should you use to clean the surface between pours?
Here’s the bottom line:
✅ Superclean or 91%+ isopropyl alcohol
🚫 Denatured alcohol, acetone, or mineral spirits
Let’s break down why.
Why Cleaning Between Layers Matters
When you’re pouring a second coat of epoxy, whether it’s Table Top over Deep Pour or just building thickness, you need the new layer to bond properly with the cured one.
Dust, grease, fingerprints, or even sanding residue can interfere with adhesion, leading to:
- Cloudiness
- Delamination
- Bubbles
- A tacky, uneven finish
So yes, cleaning is key—but the right cleaner matters just as much.
Why Use Superclean or Isopropyl Alcohol (91%+)
These options are ideal because they:
- Evaporate cleanly, no residue left behind
- Are compatible with epoxy systems, won’t interfere with bonding
- Effectively remove oils, dust, and fine debris
- Won’t soften or damage the epoxy surface
Whether you’re doing a light surface wipe after sanding, or removing fingerprints before your final coat, these are the safest and most reliable choices.
Why to Avoid Denatured Alcohol, Acetone, or Mineral Spirits
While these solvents are strong and great in other settings, they aren’t ideal for epoxy work between layers.
Here’s why:
| Solvent | Why It’s a Problem |
| Denatured Alcohol | Often contains additives that leave behind a film or residue that can mess with adhesion |
| Acetone | Dries too fast and can soften or hinder the epoxy surface if not used carefully |
| Mineral Spirits | Leaves an oily residue, which epoxy won’t bond to properly |
Bottom line? These can compromise the bond between coats, leading to issues you’ll only see after your final pour cures.
💡 Final Tip: When in Doubt, Wipe It Out
Before every new layer, always:
- Sand the surface if needed (especially if the previous layer is fully cured)
- Wipe clean with Superclean or 91%+ isopropyl alcohol
- Let it dry completely before pouring again
Using the right cleaner helps ensure a strong, crystal-clear finish and saves you from frustrating fixes later.
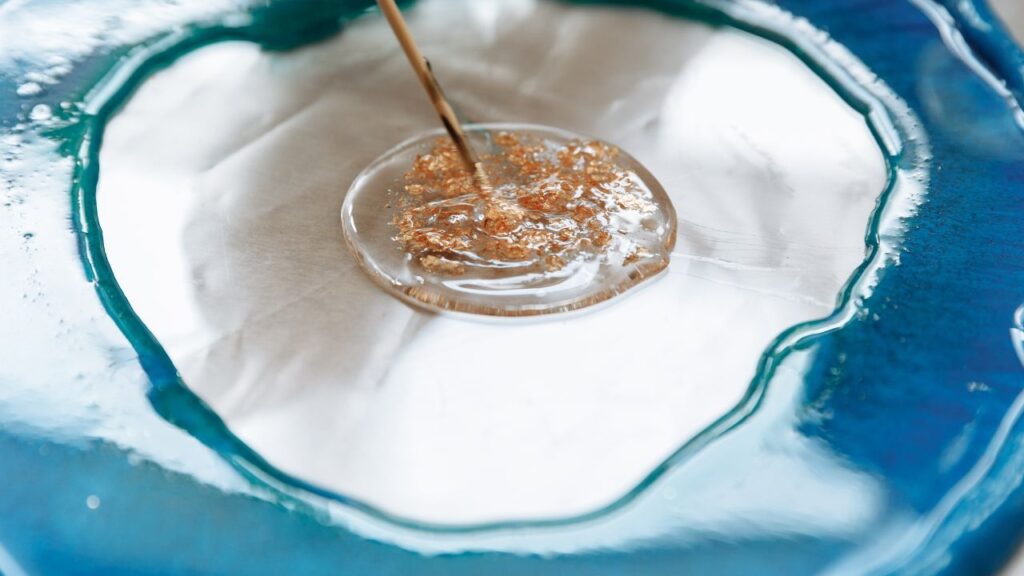
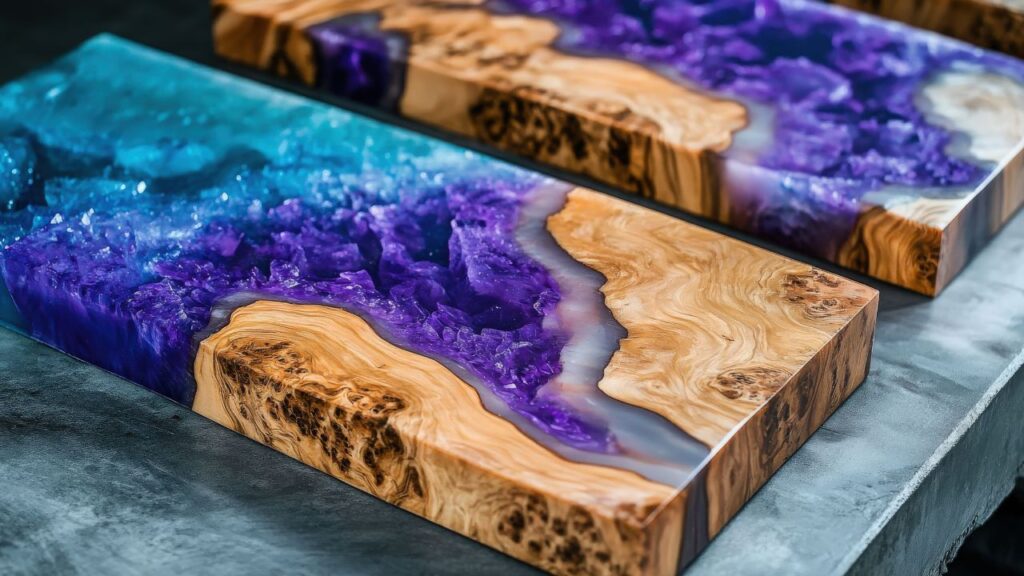
How to Add Mica Powder & Liquid Pigments
One of the most exciting parts of working with epoxy resin is the ability to customize your colors and finishes. Whether you’re going for a deep, shimmering metallic effect or a bold solid tone, mica powders and pigments are the key ingredients to bring your epoxy project to life.
But how do you add them correctly? And what’s the difference between mica powder and liquid pigment? Let’s dive in!
Mica Powder in Epoxy Resin
What it is:
Mica powder is a natural mineral ground into a fine shimmer pigment. It’s commonly used for its pearlescent, metallic, and color-shifting effects.
Best for:
-
- River tables and Deep Pours (creates depth and “galaxy” effects)
- Jewelry and art projects
- Swirls, veins, and metallic highlights
- River tables and Deep Pours (creates depth and “galaxy” effects)
How to use it:
-
- Mix your epoxy resin (Part A + Part B) first.
- Add a small amount of mica powder directly into the mixed epoxy. Start with about 1 teaspoon per 8 oz of epoxy, and adjust based on desired intensity.
- Stir until evenly blended. For swirls, only partially mix, leaving streaks of color.
- Pour as usual.
- Mix your epoxy resin (Part A + Part B) first.
Pro Tip: Layer multiple colors of mica in the same pour to create natural looking stone or water effects.
Liquid Pigments in Epoxy Resin
What they are:
Liquid epoxy pigments are concentrated colorants specifically formulated for resin. Unlike mica they don’t shimmer, they give you rich, solid colors.
Best for:
-
- Opaque finishes
- Bold solid-colored castings
- Tinting epoxy for consistent, uniform color
- Opaque finishes
How to use it:
-
- Mix your resin and hardener completely
- Add pigment drop by drop, a little goes a long way
- Stir until the color is evenly distributed
- Mix your resin and hardener completely
Pro Tip: Combine liquid pigment with mica powder for stunning depth and a solid background color with shimmering highlights.
Key Differences: Mica Powder vs. Liquid Pigment
| Feature | Mica Powder ✨ | Liquid Pigment 🎨 |
| Finish | Shimmery, metallic, pearlescent | Solid, opaque, bold |
| Effect | Depth & swirling effects | Smooth, consistent color |
| Best For | River tables, art, jewelry | Coatings, solid castings |
| Mixing | Adds sparkle and layers | Full coverage color |
How Much to Use?
-
- Mica powder: 1–2 teaspoons per 8 oz of epoxy (more = deeper shimmer)
- Liquid pigment: Start with 1–2 drops per 8 oz of epoxy and increase as needed
⚠️ Don’t overload your epoxy with colorants. Too much pigment (over ~6–8% of total mix) can prevent the resin from curing properly.
💡 Tips for Stunning Results
-
- Always mix resin thoroughly before adding pigment or mica
- Experiment with layering colors for unique effects
- Use a toothpick or stir stick to drag mica through the epoxy for marble or wave effects
- For river tables, combine liquid pigment for a base color + mica powder for shimmer
- Always mix resin thoroughly before adding pigment or mica
The Bottom Line
Adding mica powders and pigments to epoxy resin is the secret to creating stunning, one of a kind projects.
-
- Use mica when you want sparkle, depth, and pearlescent effects
- Use liquid pigments when you want bold, consistent color
- Or combine both for a pro-level finish
- Use mica when you want sparkle, depth, and pearlescent effects
With the right balance, your epoxy projects will go from simple to spectacular.
Pressure Pot: Pros & Cons for Casting
If you’re diving into resin casting, especially small molds, jewelry, or high-detail work, you’ve probably heard the term pressure pot tossed around.
So… is it worth the investment?
Here’s a breakdown of the pros and cons to help you decide if a pressure pot belongs in your resin setup.
✅ PROS of Using a Pressure Pot
1. Eliminates Bubbles (Almost Completely)
The biggest advantage? Crystal clear results.
A pressure pot compresses any air bubbles inside your resin while it cures, making them virtually invisible. Perfect for projects where clarity matters.
2. Ideal for Mold Work
If you’re casting resin into silicone molds, especially with detailed features (jewelry, figurines, dice), a pressure pot helps preserve those fine details by removing trapped air.
3. Professional-Quality Finish
Using a pressure pot is a pro level technique. You’ll get results that look smooth, clean, and commercial, without needing to manually torch the surface or babysit your pour.
4. Reduces Need for Post-Sanding
Fewer bubbles = less sanding and polishing after the resin cures. That saves time and preserves the shape/details of your casting.
⚠️ CONS of Using a Pressure Pot
1. Size Limitations
Pressure pots are usually small, great for molds and castings but not suitable for large pours like river tables or countertops.
Think: coasters, pen blanks, jewelry…not charcuterie boards.
2. Initial Cost
A good pressure pot and compressor setup can run you a few hundred dollars. Not outrageous, but more than your typical resin tools.
3. More Gear = More Setup
You’ll need:
-
- A pressure pot
- An air compressor
- Hoses and fittings
- A pressure pot
It’s a bit more involved than your standard resin pour, and there’s a learning curve.
4. Safety Considerations
Pressure pots operate under high pressure, typically 40–60 PSI. If used improperly or modified incorrectly, they can pose a safety risk. Always follow manufacturer instructions and NEVER exceed the rated pressure.
So, Should You Use a Pressure Pot?
| If You’re… | Then… |
| Casting small, high-detail molds | ✅ Pressure pot is worth it |
| Trying to eliminate all bubbles | ✅ Go for it |
| Working on large pours or surface coatings | ❌ Not needed |
| Looking for polish-free results | ✅ Huge time-saver |
| On a tight budget or new to resin | 🤔 Maybe wait until you’re ready to upgrade |
Final Tip:
If you’re using Superclear Deep Pour or Table Top, and your goal is a smooth, bubble-free finish on flat surfaces, a heat gun or torch is typically all you need. No pressure pot required.
But if you’re into casting molds, and you want that flawless, no-bubble finish every time?
A pressure pot can be a game changer.