FREE SHIPPING ON ALL ORDERS OVER $150!

What is Art Resin? - Superclear Epoxy Resin Systems

Discovering the Magic of Art Resin with Superclear® Epoxy Systems

Introduction:

Art resin has transformed the realm of art and handiwork, offering limitless prospects for artists and enthusiasts to fabricate gorgeous works with a lustrous, glass-like sheen. If you’re eager to experience the enchantment of art resin, Superclear® Epoxy Systems and their Designer Art Resin is the place to begin.

In this piece, we’ll embark on a voyage of discovery, demonstrating how to fabricate, clean, and produce gorgeous pieces with this flexible medium.

Art Resin Products

Getting Started with Art Resin: What You Need

Art resin is a two-part epoxy that is mixed together to create a liquid that can be poured into molds, or used to coat surfaces. It hardens to a clear, durable finish that resembles glass. To get started with resin art, you’ll need a few basic supplies.

Art Resin: Choose a high-quality art resin, like Designer Art Resin from Superclear® Epoxy Systems, for best results.

Mixing Cups: Measuring cups are ideal for mixing the resin.

Stir Sticks: You’ll need something to stir the resin with, such as a disposable wooden stick or a metal stirrer.

Protective Gloves: Resin can be messy and difficult to clean off skin, so wear gloves to protect your hands.

Molds or Surface to Coat: Resin can be poured into molds or used to coat surfaces, such as wood, paper, or fabric.

Optional Additives: You can add color pigments, glitter, or other materials to the resin for added visual interest.

How to work with art resin

How to Make Art Resin: A Step-by-Step Guide

Making art resin is a simple process, but it’s important to follow the instructions carefully to achieve the best results. Here’s a step-by-step guide to making art resin with Designer Art Resin from Superclear® Epoxy Systems:

  1. Prepare your workspace: Cover your workspace with a disposable surface, such as a plastic drop cloth or plastic sheeting, to make cleanup easier. Put on your protective gloves.
  2. Measure the resin: Use measuring cups to measure equal parts of Part A and Part B of the resin, according to the manufacturer’s instructions.
  3. Mix the resin: Pour both parts of the resin into a mixing cup and stir thoroughly for 2-3 minutes until the mixture is fully combined and has a uniform color.
  4. Add additives (optional): If desired, add color pigments, glitter, or other additives to the resin. Stir gently to incorporate the additives.
  5. Pour the resin: Pour the resin into molds or onto surfaces.
  6. Pop bubbles: Use a heat tool, such as a blowtorch or heat gun, to pop any bubbles that form on the surface of the resin.
  7. Allow the resin to cure: Place the molds or coated surfaces in a cool, well-ventilated area and allow the resin to cure completely. The curing time will depend on the manufacturer’s instructions, but Designer Art Resin cures in 24 hours.
How to clean art resin

Cleaning Up After Your Art Resin Project

After you’ve finished your art resin project, it’s time to clean up. Resin can be messy, but it’s easy to clean up with the right tools and materials. Here’s what you need to know:

  • Clean tools promptly: Resin hardens quickly, so be sure to clean your mixing cups, stir sticks, and any other tools you used promptly, before the resin has a chance to dry.
  • Soap and water: Use soap and warm water to wash your tools and any residue from your workspace.
  • Isopropyl Alcohol 90% or Higher: If you need to remove any dried resin from your tools, use Isopropyl Alcohol 90% or higher or Superclean Epoxy Cleaner to dissolve it.
  • Dispose of residue properly: Resin is not biodegradable, so be sure to dispose of any residue in an environmentally responsible manner, following the manufacturer’s instructions.
Resin art ideas

Resin Art Ideas: Inspiration for Your Next Project

Looking for ideas to ignite your next resin craft endeavor? Look no further! Here are several in-demand and innovative resin art concepts to consider:

  • Resin art coasters: Fabricate unique and practical coasters for your dwelling by blending resin with small rocks, glass beads, or other embellishments.
  • Resin art jewelry: Blend resin with shimmer, tints, or preserved blooms to design lovely and one-of-a-kind pieces of jewelry.
  • Resin art wall art: Pour resin into canvas stretchers or alternative shapes to create captivating and gleaming wall art.
  • Resin art keychains: Mix resin with hues or glitter to personalize your belongings with vibrant and bespoke keychains.
  • Resin art planters: Produce striking planters for your cherished plants by filling molds with resin and including decorative elements like stones, shells, or even miniature plants.

Here are some examples of these resin art concepts:

With these resin art concepts, you’ll have a never-ending supply of inspiration for your next venture. Whether you’re seeking to make functional pieces for your home or stunning pieces of jewelry, resin art has something for everyone. So, unleash your imagination and enjoy!

Ocean Resin Art

The Art of Resin: Tips and Tricks

Once you’ve got the basics down, it’s time to start experimenting with art resin. Here are a few tips and tricks to help you get started:

  • Experiment with additives: Adding color pigments, glitter, or other materials to the resin can create stunning visual effects. Experiment to find what works best for your projects. We recommend Eye Candy Pigments, which we also sell on our website.
  • Play with molds: Resin can be poured into a wide variety of molds, from silicone to plastic to metal. Try different molds to see how they affect the look of your pieces.
  • Layer resin: You can create multi-layered effects by pouring different colors or textures of resin one on top of the other.
  • Protect your work: Resin can scratch or yellow over time if it is not properly protected. Make sure to store your pieces in a cool, dry place out of direct sunlight for the greatest longevity possible with your projects.

Frequently Asked Questions About Art Resin

Art resin is a versatile product that has many applications, but it’s also natural to have questions about it. Here are some of the most frequently asked questions about art resin:

What is the drying time for art resin?

The curing time for art resin can vary based on the brand and the surroundings in your workspace. Usually, it takes 24 hours for Designer Art Resin to fully cure.

Is art resin good for beginners?

Superclear® Epoxy Systems’ Designer Art Resin is a user-friendly product that provides easy-to-follow instructions and a straightforward formula, making it perfect for those starting out with resin art.

How do I start resin art?

To start resin art, you’ll need a few basic supplies and some inspiration. Choose a high-quality art resin, like Designer Art Resin from Superclear® Epoxy Systems, and start experimenting with molds, additives, and different techniques.

Conclusion:

Art resin is a flexible material that offers unlimited opportunities for artists and hobbyists to produce magnificent works with a lustrous, glass-like appearance. Regardless of your level of skill as an artist, Designer Art Resin from Superclear® Epoxy Systems is a top-notch selection for your upcoming resin art endeavor.

Thanks to its uncomplicated formula and simple-to-follow guidance, you can quickly embark on creating gorgeous masterpieces. So why not give it a shot now and experience the enchantment of art resin for yourself?

Certified Designer Art Epoxy Resin

6 Comments. Leave new

  • What is the working time for the Designer Art Resin?

    Reply
    • Hey Angie, great question! The working time is typically around 30-45 minutes before the epoxy begins to gel. Let me know if you have any other questions! I’d love to help. Have a fantastic day!

      Reply
  • Is this resin an 1 to 1 part ratio? or do i need a diferent Ratio? i cant find instructions anywhere. the Original Pamphlet says 100% part A and 83% part B by volume but i’m not sure how that measures out.
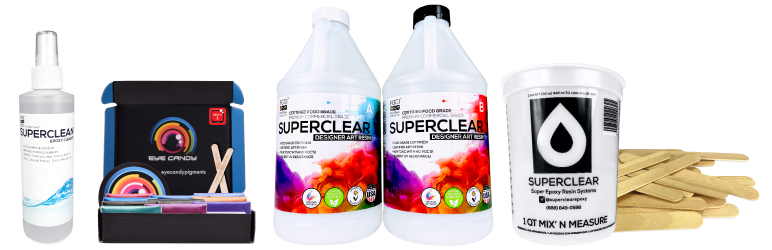
    Reply
  • Hi! What viscosity is your art resin? Do you recommend warming each part prior to mixing?

    Reply
    • Stephen Rodriguez
      January 8, 2024 9:41 am

      Hey Freddie, great question!

      The best way I can think to answer it is to compare it with our other products..

      Our Deep Pour Epoxies are about 1,000cps while our Table Top Epoxy is around 14,000cps.

      Designer Art Resin is 7,000cps, making it essentially the middle man between those 2 different formulations of epoxy.

      So, thinner than honey, but thicker than water? 🤔

      If you are concerned that the resin may be too thick of a viscosity before mixing, you can always warm the bottles of epoxy up in a water bath to around 110-130F to thin the resin.

      I would make sure to let the bottles rest so that the internal temperature of the epoxy is not too hot once you go to mix the A&B sides together, as that can have adverse effects on your cure:

        • Overheating
        • Cracking
        • Yellowing
        • Shrinking
        • Bubbling

      Hope that helps!

      Reply

Leave a Reply

Your email address will not be published. Required fields are marked *

Fill out this field
Fill out this field
Please enter a valid email address.
You need to agree with the terms to proceed

Menu